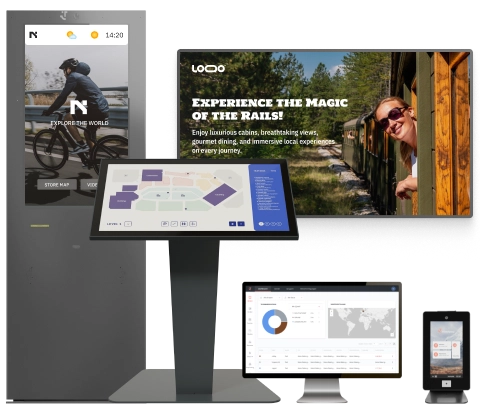

To set up a visitor flow in friendlyway, define the guest category and location, choose the required information and documents, and arrange the workflow stages. Then connect pre-registration, self-service kiosk or reception check-in, host notifications, badges, physical access, and check-out.
Before launching the flow, run complete test visits for every important scenario. This creates a consistent visitor journey from invitation and arrival through identification, access, and departure.
Key Facts at a Glance
- A friendlyway workflow is a configurable sequence of screens and actions.
- Different guest categories should use different workflows when their data, documents, or access rules differ.
- Online pre-registration requires an enabled self-registration step and a registration link in the invitation template.
- Guests can check in at a kiosk with identifiers such as a QR code, barcode, or PIN.
- Host notifications, badge issuance, and approval rules are configured around the check-in result.
- When integrated, check-out should close the visit, update the visit log, and end temporary access.
- Test every workflow end-to-end before publishing it to a live kiosk.
What Is a Visitor Flow in friendlyway?
A visitor flow guides a person through registration, check-in, and check-out. In friendlyway Visitor Management, it is called a workflow and is built from screens whose settings control the visitor experience and related actions.
How the visitor flow works
The workflow connects guest-facing steps with back-office actions. An invitee may register, accept an agreement, confirm their identity, notify a host, receive a badge, and check out. Statuses and timestamps support visitor tracking and reporting.
Which visit stages can be configured?
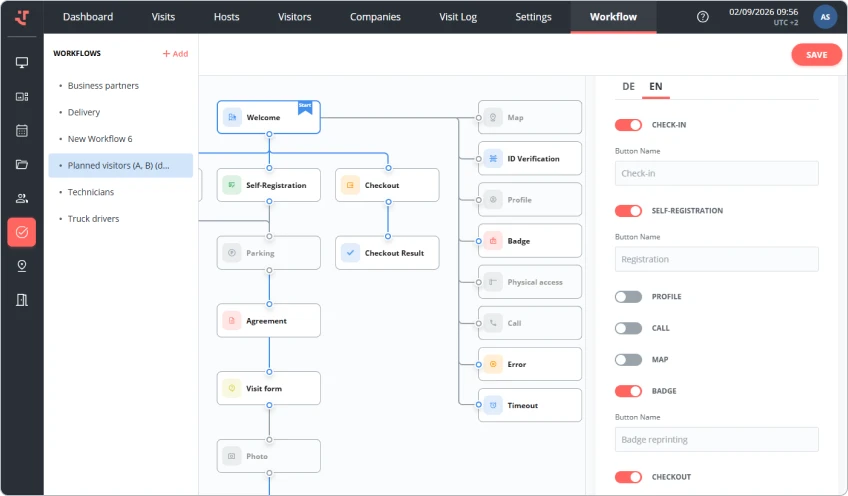
The basic workflow includes the welcome stage, self-registration, check-in, and checkout. Optional screens add functions such as agreements, forms, photos, maps, ID verification, badges, physical access, and calls.
| Stage | Typical configuration |
| Before arrival | Invitation, visitor pre-registration, documents, and instructions |
| Arrival | Language, identity verification, and registration |
| Check-in | QR/PIN scanning, confirmations, approval, and host notifications |
| On site | Visitor badge printing, directions, and temporary access |
| Departure | Visitor check-out, credential deactivation, and visit log update |
What Should You Prepare Before Setting Up a Visitor Flow?
Prepare the business rules before opening the workflow editor: guest categories, required data, hosts, locations, access boundaries, notification recipients, and automation rules. Also confirm administrator permissions and registered, activated target devices. This keeps policy decisions out of the technical setup.
Define visitor types and use cases
List who enters the site and why. Common categories include guests, applicants, contractors, delivery drivers, and recurring service providers. Separate them when their registration, safety, approval, or visitor access requirements differ.
Determine required visitor information
Specify the minimum data needed, such as name, company, email, vehicle number, or visit purpose. The GDPR requires limiting data to a stated purpose and retaining it only as long as necessary.
Define hosts, locations, and access rules
Create the hosts and locations, then document permitted areas and any escort or approval requirement. The visitor management system supports shared configuration for locations, visit types, fields, integrations, and privacy settings.
Decide which steps should be automated
Choose where automation should replace manual reception work. Candidates include invitations, confirmations, arrival alerts, badge printing, temporary credential activation, reminders, and automatic check-out.
Discover how friendlyway can support a consistent, secure check-in experience across your locations.
How to Create a Visitor Flow in friendlyway
Start with a standard workflow or adapt an existing one. Reusing a proven flow is usually faster and less error-prone when a new guest category needs only a few different steps.
Create a new visitor flow
Give the workflow a clear name and define its general properties. These include supported languages, screen time-out rules, date and time formats, visual design, and the navigation options available to guests.
Select the location and visitor type
Align each workflow with the appropriate location, guest category, and kiosk deployment. When a visit is planned, its type should determine which information, documents, and rules apply.
Define the required registration fields
Mark only essential fields as required and add conditional forms or agreements where needed. Keep permanent profile information separate from visit-specific questions. This makes the registration form shorter and reduces unnecessary personal-data collection.
Configure the sequence of visitor steps
Arrange the required stages in the order guests should encounter them. The published kiosk sequence determines the actual order, so verify the complete journey on the target device rather than relying only on the workflow overview.
Optional expert onboarding: Organizations that prefer not to configure workflows internally can use friendlyway’s onboarding service. Its specialists guide the initial setup, verify that each process runs smoothly, and help coordinate hardware integration before launch.
How to Configure Visitor Pre-Registration
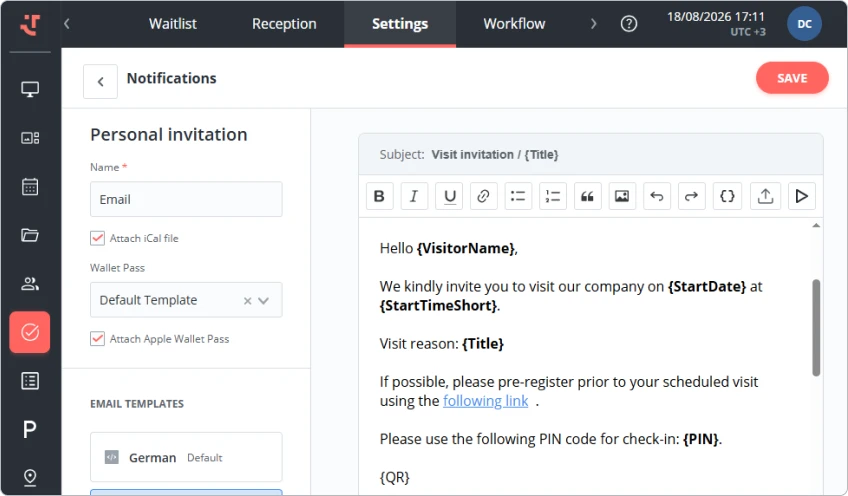
Pre-registration lets a planned guest complete selected steps before arrival. Enable online registration in the workflow and include a personalized link in the invitation template. The invitee can then complete the configured forms, questionnaires, or agreements online.
Enable pre-registration for visitors
Enable online registration for the relevant planned guest categories. Confirm that every form, agreement, or questionnaire intended for remote completion is included and appropriate for that visit type.
Configure invitation and registration forms
Build a personal or group invitation with the correct language and branding. Include the invitee’s personalized registration link and, where appropriate, a PIN or QR code, location, host, and scheduled visit time.
Define required visitor information
Ask for information that the host or security team genuinely needs before arrival. Contractors may need company and safety acknowledgements, while a standard office guest may need only identity, contact, and visit details.
Send visitor instructions before arrival
The visitor invitation should explain where to go, when to arrive, which identification to bring, and how to use the QR code or PIN. State which documents or safety instructions must be completed online and provide a contact for problems.
How to Set Up Visitor Check-In
Configure a reliable check-in path and an assisted fallback. friendlyway supports kiosk identification, on-site registration for unplanned guests, and manual check-in by reception or authorized staff.
Configure reception check-in
For manual reception check-in, define how staff will confirm identity, locate the planned visit, and record the arrival. If you use RFID cards, verify the card number during assisted check-in.
Enable self-service kiosk check-in
Publish the workflow to the correct kiosk and confirm the scanner and printer are connected. An unregistered guest can complete the visitor registration system steps, documents, or questionnaires on site.
Set up QR code check-in
Include a QR code or barcode in the invitation and configure the check-in process to accept scanning. Also keep PIN or assisted lookup available when an invitee cannot display the code or the scanner fails.
Configure required confirmations and documents
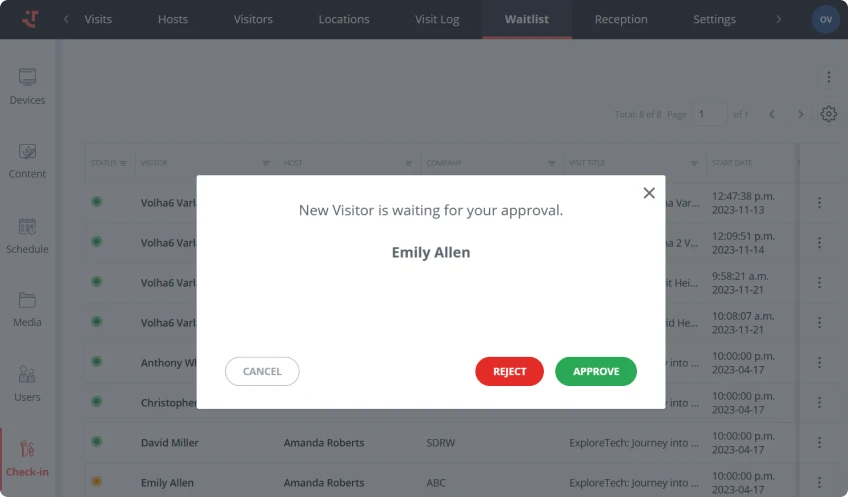
Include agreement, form, or ID-verification steps before access is confirmed when policy requires them. For higher-risk visits, use a waitlist process so access is granted only after an authorized person approves the guest.
How to Configure Host Notifications
Configure notifications after successful on-site check-in. The friendlyway workflow supports different recipient types, with email, SMS, and Microsoft Teams used for arrival notifications.
Define when the host should be notified
Use arrival as the main trigger, then decide whether no-show, not-checked-out, cancellation, or approval events also require alerts. Avoid duplicate channels unless the operational risk justifies them.
Configure email and SMS notifications
Create language-specific notification templates that insert the relevant guest and visit data. Email and Teams are the standard channels for arrival alerts. Text-message templates are also available for specific events, such as approval or decline.
Automate arrival notifications
Link a successful arrival or check-in to the required notification channel, template, and recipients. Run a real delivery test rather than relying on a configuration preview.

How to Set Up Badges and Access Permissions
Badges identify guests; access permissions determine where and for how long they may enter. Configure both so each credential matches the category, location, visit period, and policy.
Configure visitor badge printing
Create a badge template with approved fields, such as guest name, company, organizer, location, visit type, date, and QR code. Reception can issue badges, or visitors can print them automatically during supported self-service check-in.
Define access permissions by visitor type
Map each guest category to the minimum required zones and conditions. A delivery driver may need yard access, a contractor may need a controlled production area, and an office guest may need only reception and meeting-room access.
Connect the visitor flow with access control
Coordinate the visitor workflow with the existing physical access control system. friendlyway supports integrations with turnstiles and other access hardware; validate the supported controller, credential format, and failure behavior before launch.
Set expiration rules for temporary access
Set temporary credentials to expire at check-out or at a defined visit end time. NIST physical-access guidance recommends issuing authorization credentials, reviewing authorized access, and removing people when access is no longer required.
How to Configure Visitor Check-Out
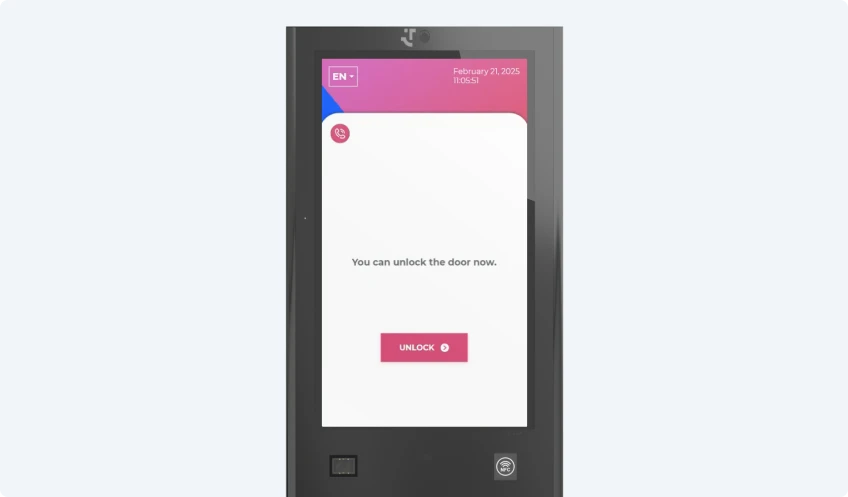
Check-out closes the active visit and records that the person has left. Configure both a self-service method and an administrative fallback, then link departure to any temporary badge or access credential.
Set up manual and self-service check-out
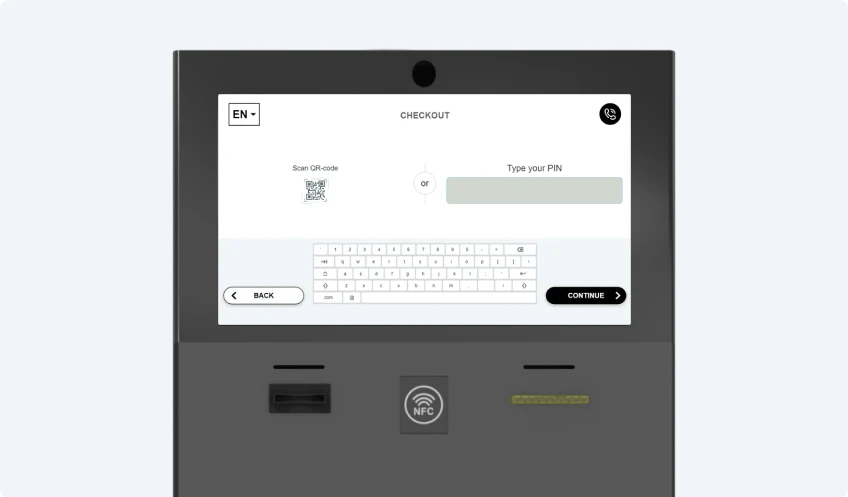
Guests can check out at a kiosk with an RFID card, PIN, QR code, barcode, or external ID. Reception or authorized staff should also have a manual check-out method for exceptions.
Automatically deactivate visitor access
Where access control is integrated, map a successful check-out or automatic check-out time to credential deactivation. Test the rule at doors, gates, or turnstiles rather than checking only the visitor management software status.
Record departure time and visit status
Confirm that completed check-ins and check-outs appear in the visit log with the correct timestamps and status. This record supports reception management, on-site visibility, reporting, and incident review.
How to Test the Visitor Flow Before Going Live
Test the published experience on the actual kiosk and hardware. A configuration may look correct but still fail because of a template, screen order, scanner, printer, integration, or delivery issue.
Run a complete test visit
Create a realistic visit, send the invitation to a test address, complete pre-registration, check in, print a badge, and check out. Record the result of every step.
Check notifications and access permissions
Verify email, Teams, and any enabled text-message delivery. Confirm that authorized doors open, restricted doors remain locked, and temporary access ends at the expected time.
Test different visitor scenarios
Cover at least these cases:
- Planned guest with completed pre-registration
- Planned guest without pre-registration
- Unplanned guest at the kiosk
- Invitee requiring host approval
- Guest who forgets to check out
Identify and correct workflow issues
Log each issue with its guest category, screen, device, and timestamp. Fix the relevant configuration, republish, and repeat the complete scenario.
Best Practices for Visitor Flow Configuration
The best visitor flow management balances speed, safety, privacy, and control. It asks only what is necessary, guides guests clearly, and automates predictable actions.
Keep the check-in process as simple as possible
Remove optional questions, duplicate confirmations, and unnecessary screens. Use plain instructions and a visible fallback. Simplicity improves the visitor experience and supports the GDPR principle of data minimization.
Create different flows for different visitor types
Do not force guests, contractors, and drivers through one workflow. Separate flows clarify requirements and reduce the risk of granting the wrong access or skipping required safety steps.
Automate repetitive steps
Use visitor workflow automation for invitations, arrival alerts, badge printing, reminders, and check-out rules with unambiguous triggers. Keep approval manual when it depends on identity, risk, or changing site conditions.
Review visitor flows regularly
Review workflows after policy, site, hardware, staffing, or integration changes. Also examine failed registrations, long check-in times, and support requests to find steps that no longer work as intended.
Let our experts help you configure the right workflows and seamlessly integrate your hardware.
Common Visitor Flow Setup Mistakes
Most errors come from copying a generic process without validating the real guest journey. The following mistakes affect usability, notifications, physical security, or data quality.
Requesting too much information
Long forms delay arrival and collect data without a clear operational purpose. Make fields mandatory only when they support identification, safety, communication, access, or a documented legal requirement.
Using the same flow for every visitor type
A universal flow either burdens low-risk guests or underserves higher-risk groups. Use separate visitor types and workflows when documents, approvals, equipment, or access zones differ.
Missing host notifications
A successful visitor check-in system can still create a poor arrival experience if the host isn’t notified. Test recipient mapping, templates, integrations, and delivery for different scenarios.
Incorrect access permissions
Overbroad permissions create risk; overly narrow permissions create delays. Validate zones, schedules, approval dependencies, credential issuance, and expiration with the security team.
Skipping end-to-end testing
Testing screens individually misses failures between invitation, registration, kiosk, printer, notification, and access systems. Always test the complete journey on production-equivalent hardware before launch.
Conclusion
A reliable friendlyway Visitor Management setup starts with clear guest categories and policies, not screen configuration. Build the digital reception workflow around minimal data, the right sequence, dependable notifications, and time-limited access.
Test every scenario from invitation through check-out. Publish only after the entire journey works on the real kiosk, with the real templates, hardware, and integrations.
Need more information? Check out the frequently asked questions below or contact our support team.
Sources
FAQ
A visitor flow is a configured workflow that guides a person through the required stages of a visit. It can cover invitation, pre-registration, self-registration, document acceptance, identification, check-in, approval, host notification, badge issuance, physical access, and check-out. Different workflows can serve different guest categories and locations.
Create a new workflow or adapt an existing one for the relevant guest category. Define its general properties, stages, required data, documents, notifications, badge rules, and access conditions. Connect the necessary templates, devices, and integrations, then complete an end-to-end test before launch.
Yes. Use separate workflows when guests, contractors, drivers, applicants, or recurring visitors need different data, agreements, approval rules, or access permissions. friendlyway also supports visit types with different field sets, helping the visitor management platform collect information that matches each visit’s purpose.
Yes. A friendlyway visitor kiosk can support on-site registration and check-in using identifiers such as QR codes, barcodes, or PINs, depending on the configured workflow and hardware. Guests may also complete forms, questionnaires, or agreements. Keep a reception-assisted fallback available for identification or device problems.
Yes. On-site registration notifications can be sent to organizers and deputy organizers by email or Microsoft Teams chat. Teams calls and other call options can also be integrated into kiosk workflows. SMS or text-message availability can depend on the notification type and tenant configuration, so confirm it before rollout.
Yes. friendlyway supports integration with physical access management hardware such as turnstiles and other controlled entry points. The exact implementation depends on the access-control system and selected integrations. Define permissions by guest category, require approval where necessary, and make temporary access expire at check-out or the authorized end time.